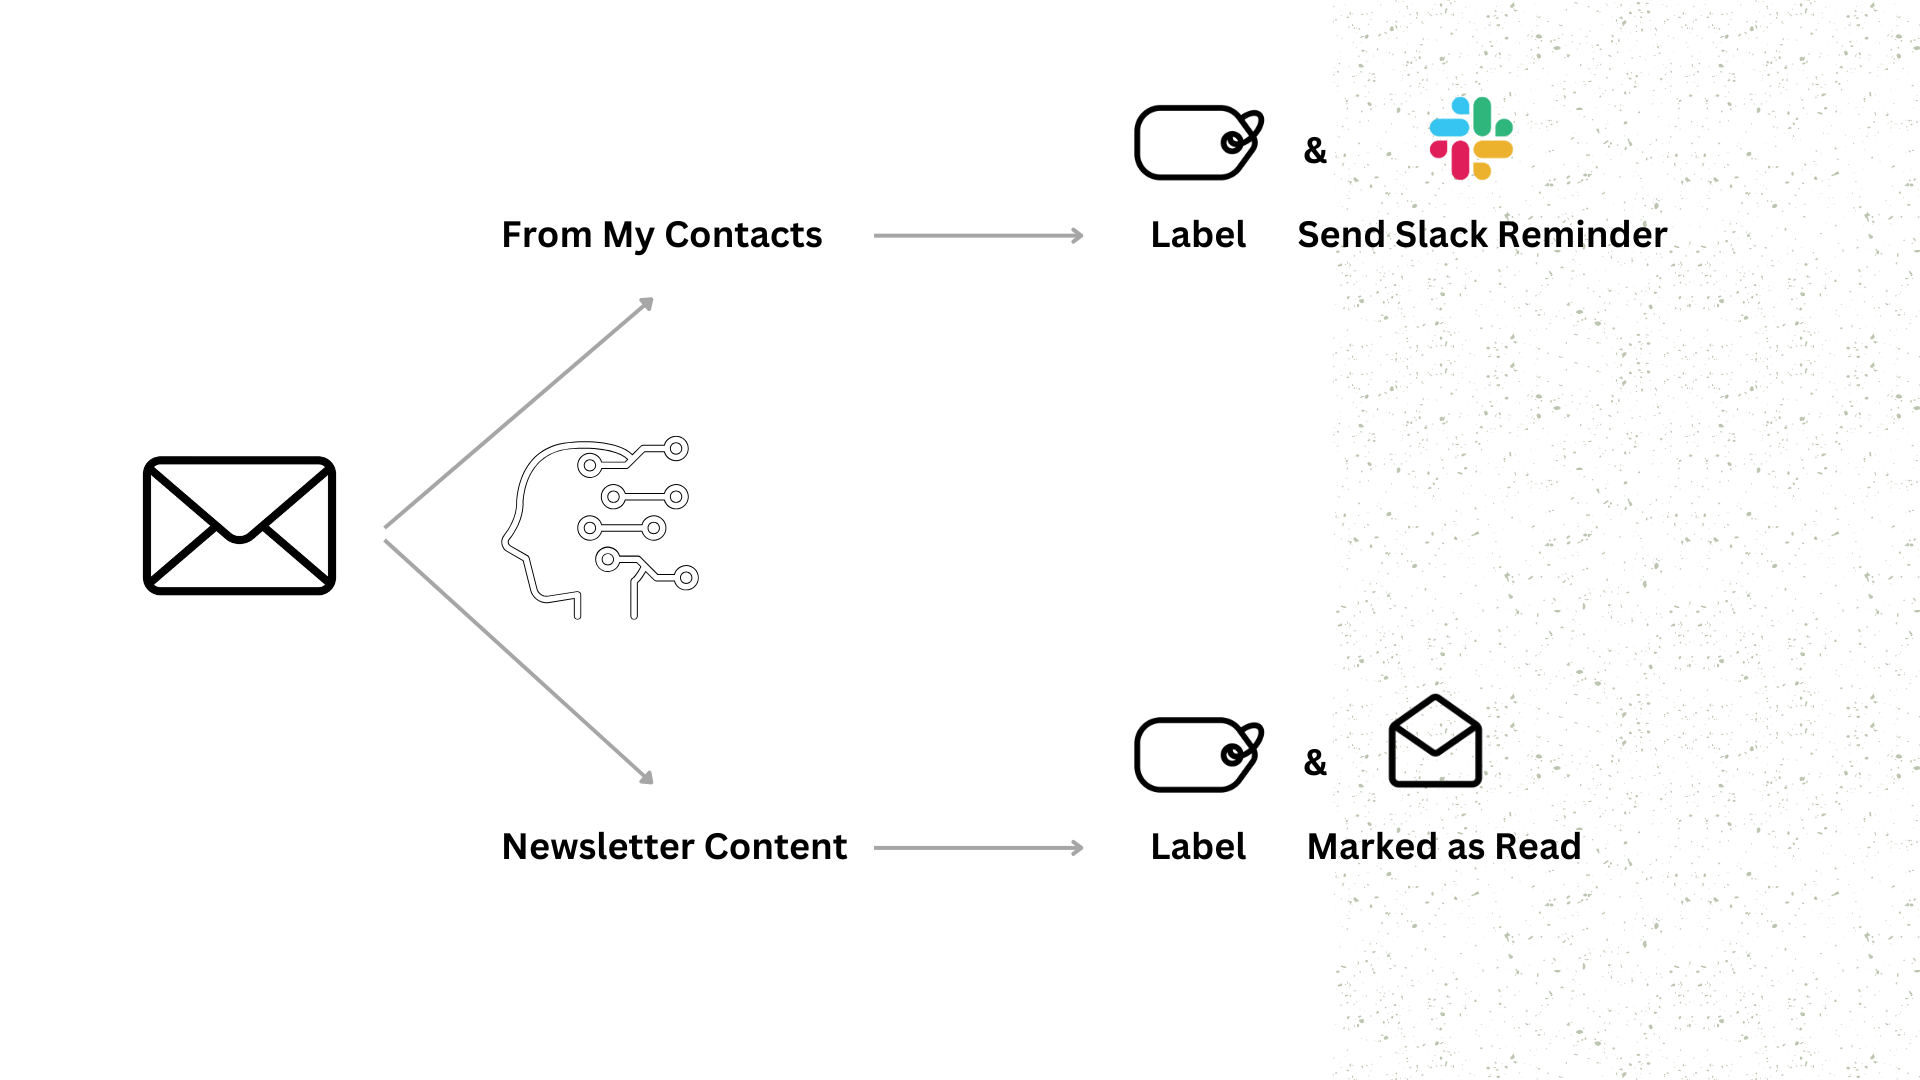
In this quick tip session, discover how to create a useful AI automated workflow to filter and alert actions on every email that comes in. Helpful for folks with overflowing inboxes, entrepreneurs, newsletter lovers!
Read MoreVeggie Quest - No Code Apps Prototyping with Relay
In this engaging session, discover how to create a fun, AI-powered, no-code application using Lovable Dev to help kids enjoy eating vegetables. Designed for non-techies, this step-by-step tutorial shows you how to build 'Veggie Quest', a mobile-friendly web app with rewarding features and colorful animations, perfect for motivating children to eat their veggies while parents track progress. Tune in for easy, intuitive coding-free app development!
Read MoreManage My Social Media Posting in 10 Mins
A simple flow that you can set up right away to generate some content and create an automated workflow that goes straight to your inbox for revision and approval
Read MoreBreaking Down a Patent with AI: ChatGPT vs. Google Studio AI
How GenAI voice interfaces help analyze a real-world patent and provide actionable insights in ways that are easy and accessible to the everyday people
Read MoreSPEEDY Market Validation? Stand up a landing page with this 10 mins AI demo
Use Reloom.io to quickly design and launch a professional B2B landing page
Read MoreMy Attempt to Save Hours (and Icks!) drafting Social Media Content with AI
Ok, experiment time - I recently whipped up a custom GPT in under 15 minutes that drafts social media content daily, based on my bio, tone of voice, and past posts.
Read MoreOK - Let's talk image generators and DEI!
The initial outputs predominantly featured white people in privileged settings and authoritative roles. Meanwhile, Black and POC characters were portrayed as impoverished or as those being taught. Additionally, I almost always had to specify the inclusion of female figures. Since my work serves diverse, underprivileged communities, I must represent them, particularly when presenting to these audiences. Educational opportunities must not discriminate, and it's crucial that we acknowledge these biases in AI outputs so we can consciously correct them and provide feedback to better reflect the diversity of the world around us.
Read MoreAI Mastery Journal // JAN 31 - Supercharge Your Presentations with AI ChatGPT & Dall E!
Welcome to the Learn by Doing Series, where designers and business owners can learn a useful tool quickly (less than 15 mins). We will explore industry best in class tools in AI, Productivity, Coding, Prototyping... and how they can help to propel our businesses forward.
This snappy 12 mins demo uses OpenAI ChatGPT and its image generator Dall E to create illustrations for presentations and pitch decks. Great for designer, entrepreneurs, product managers, strategists, and YOU!
This video is part of the Learn by Doing series by Thu Do on TAILORU Education. You can view more and subscribe to the channel here.
AI Mastery Journal // JAN 31 - Bolt.new Video Prototype for Pitching in under 15 Mins!
Welcome to the Learn by Doing Series, where designers and business owners can learn a useful tool quickly (less than 15 mins). We will explore industry best in class tools in AI, Productivity, Coding, Prototyping... and how they can help to propel our businesses forward.
This snappy 15 mins demo uses Bolt and its prompt to code generator to create prototypes for presentations and pitch decks. Great for designer, entrepreneurs, product managers, strategists, and YOU!
This video is part of the Learn by Doing series by Thu Do on TAILORU Education. You can view more and subscribe to the channel here.
AI Mastery Journal // JAN 14 - Bolt.new Prototype
ChatGPT + Zapier Interfaces Integration
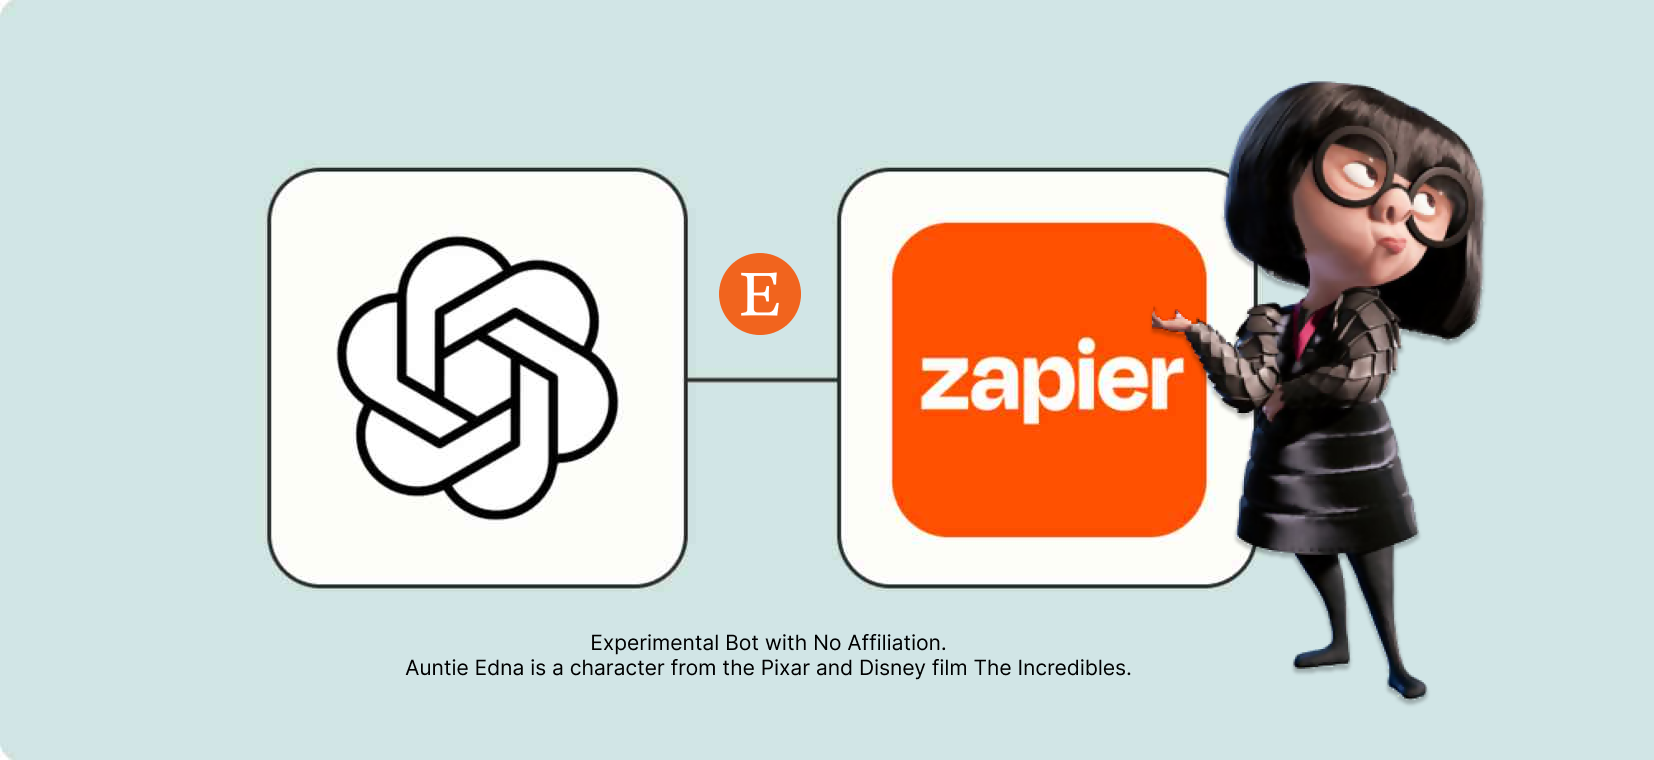
Experiment: An Auntie Edna Etsy Description Writer Bot with ChatGPT and Zapier Interfaces
Experiment using the power of ChatGPT generative text and Zapier automation with the wit of Auntie Edna the character to write great Etsy descriptions, therefore saving time and building my brand at the Archaeologists!
Read MoreRock Paper Scissors - Shoot in Javascript!
const rps = (p1, p2) => {
  // Check for draw
  // Check if p1 wins
  // Else p2 wins
  if (p1 === p2) {
    return "Draw!";
  }
  else if ((p1 === 'scissors' && p2 === 'paper') || (p1 === 'paper' && p2 === 'rock') || (p1 === 'rock' && p2 === 'scissors'))
  {
    return "Player 1 won!";
  }
  else {
    return "Player 2 won!";
  }
};Counting sheep outloud in Javascript
Recently, I’ve decided that I need some ******** skillz so now I’ve gone through a process of doing some Kata right before bed time.
This one is for counting sheep. This is for my own development and journal so if you’re going at it own your own, BIG SPOILER ALERT below
When given a function(3), return a string of “1 sheep…2 sheep…3 sheep…”
var countSheep = function (num){

  //start with a counter i = 1
  // increment i
  // stop until i == num
  // "interpolation" to insert variables
  // return joint array
    let smallArr = "";
    for (let x = 1; x <= num; x++)
    {
       smallArr += `${x} sheep...`
    }
    return smallArr;
};Iron Mask Prototype - Face tracking filer in SparkAR
Imagine the man in the iron mask is stuck in a dungeon under water. This is what it would look like. Dark thoughts, I know but was the ‘mood’ at the time.
Created using SparkAR.
Assets
Blarney Castle
Black glowing lotus
Learnings
SparkAR is actually very intuitive to use. The Patch Editor needs a lot of UX work to make useful but the currently state is logical enough that after a new trials and errors, it’s possible to create (o stumble) upon some cool effects
Next steps: Create scaled animation and add materials to bubbles
Building a multi layers game using Unity and C#
Building a 2D game where the cube goes around the farm field to collect pieces of gold. It’s COVID time, every one needs to earn a bit of extra income, including once-upon-a-time in-animated objects.
The project goal was to get familiarized with the Unity and Visual Studio Code environments and begin to build a game scene with multiple layers and inter-activities.
The game object [box] should be able to:
Obey the rules of gravity and physics
Move with left, right, top, down by ADWS and by keyboard arrows
Jump with space bar
Stalked by the main camera object
Assets:
PBR Brack Material (free)
ADG_Textures (free)
Prototyping_Pack_Free
Settings: Getting the cube to obey the rules of gravity and physics
Code and assign a rigidbody to the cube (see code below) and makes sure Mesh Collider is enabled for planes and terrain
In progress #1
Grass material
In progress #2
In progress #3
Gif Demo
Code: Getting the cube to move with left, right, top, down by ADWS and by keyboard arrows + Jump with space bar
using System.Collections;
using System.Collections.Generic;
using UnityEngine;

public class cubeBehavior : MonoBehaviour
{
    private Light myLight;
    private new Rigidbody rigidbody;

    // jump variables
    public float jumpHeight;

    // rotate variable
    public Vector3 rotateAmount;

    // Start is called before the first frame update
    void Start()
    {
        print( message: "Hi from start method");
        myLight = GetComponent<Light>();
        rigidbody = GetComponent<Rigidbody>();
    }
    // declare the light variable
    // grab the light variable
    // Update is called once per frame
    void Update()
    {
        // print( message: "Hi from update method");
        // script to turn light on / off the light variable

        if (Input.GetMouseButtonDown (0)) {
            print ("The Left mouse button was pressed");
            myLight.enabled = !myLight.enabled;
            // rigidbody.MovePosition(transform.position + transform.forward);
            rigidbody.transform.Rotate(new Vector3(0, -10, 0));
            // rotate the cube wieh clicks rigidbody.transform.Rotate(new Vector3(3, 4, 1));
        }

        if (Input.GetMouseButtonDown (1)) {
            print ("The Right mouse button was pressed");
            myLight.enabled = !myLight.enabled;
            // rigidbody.MovePosition(transform.position + transform.forward);
            rigidbody.transform.Rotate(new Vector3(0, 10, 0));
            // rotate the cube wieh clicks rigidbody.transform.Rotate(new Vector3(3, 4, 1));
        }
        // adding keyboard navigation
        if (Input.GetKey (KeyCode.W)) {
            transform.Translate (0.0f, 0f, 0.01f);
            }
        if (Input.GetKey (KeyCode.S)) {
            transform.Translate (0.0f, 0f, -0.01f);
            }
        if (Input.GetKey (KeyCode.D)) {
            transform.Translate (0.01f, 0f, 0f);
            }
        if (Input.GetKey (KeyCode.A)) {
            transform.Translate (-0.01f, 0f, 0f);
            }
        // adding arrows navigation
        if (Input.GetKey("up")) {
            transform.Translate (0.0f, 0f, 0.01f);
            }
        if (Input.GetKey("down")) {
            transform.Translate (0.0f, 0f, -0.01f);
            }
        if (Input.GetKey("right")) {
            transform.Translate (0.01f, 0f, 0f);
            }
        if (Input.GetKey("left")) {
            transform.Translate (-0.01f, 0f, 0f);
            }
        if (Input.GetKey("space")) {
            print ("the space button was pressed");
            rigidbody.AddForce(Vector3.up * jumpHeight);
        }

    }
}
Code: Getting the Main camera to stalk the cube
using System.Collections;
using System.Collections.Generic;
using UnityEngine;

public class cameraController : MonoBehaviour
{   public float turnSpeed = 4.0f;

   //create a myCube variable
    public Transform myCube;
    // create offset camera
    public Vector3 cameraOffset;

    // Start is called before the first frame update
    void Start()
    {
        cameraOffset = new Vector3(myCube.position.x, myCube.position.y + 4.0f, myCube.position.z + 3.0f);
    }

    // Update is called once per frame
    void Update()
    {

    }
    void LateUpdate()
    {
        cameraOffset = Quaternion.AngleAxis (Input.GetAxis("Mouse X") * turnSpeed, Vector3.up) * cameraOffset;
        transform.position = myCube.position + cameraOffset;
        transform.LookAt(myCube.position);
    }
}
Learnings
I think that Unity and its integration with Visual Studio Code is a good smart relationship. What’s not as smooth is the constant drag and drop and assignment that needs to happen in Unity after the code is in VSC. How come Unity doesn’t allow for code editing in-app? Seems like a mis-opportunity to me.
What’s next:
Switching that cube into a farmer, because yes - I’m biased to the pre-conception that a farmer should be on a farm vs. a cube
Create a reward interactive whereas upon coming into contact, the gold would turn into dust with some magical animation that celebrates the user’s winning moment
Change the keyboard movement to reset based on current cube direction and not original orientation
How I rewire and mod up a Mid Century Modern spring loaded lamp with no prior experience. Insane? I think not!
Ingredients:
1 old lamp: $12
3 sockets: $12
1 cord with plug: $10
Tools:
Wire cutter: $6
Wire stripper: $10
Screw driver
Metal brush
Swiss army knife
Super glue
Time: 4 hrs
(No cost attached, especially not at a consultant’s hourly rates :P)
How did you end up rewiring a lamp, Thu? Isn’t there something else you should be doing instead?
Practice what you preach.
That old wisdom that makes doers do and makers make. I don’t claim to be an exceptional doer nor a gifted maker but my obsession with fine handcrafts is real. Craft is at the center of what I do: our startup, our consulting work, our clients, and how I spend my weekend. I also have a soft spot for anything well designed. Call it a professional hazard.
That’s why when I saw a virtual auction for all things Mid Century Modern (MCM), my head followed my heart and my heart followed my hands as I clicked away and watched item after item slipping away under my tight purse string. As a startup dreamer who recently went through a job transition, I can’t compete with what seemingly are the ‘bottomless’ wallets of Long Islanders. Tough competition where I am when it comes to collecting and preserving a piece of history.
When hope just started to dwindle, an item caught my eyes at the end of the auction— a spring loaded lamp, MCM, with original fiberglass and teak wood. I told you I’m slightly obsessed. No shame needed.
“Have got to be in the 50–60s"
> “must be expensive”
>> “but it’s so beautiful”
>>> “ok, fine. let me see the price. prepare for impact…”
>>>> “8 bucks?!?! That’s unreal. What’s wrong with it?”
That’s exactly my thought process and sure enough, the description read “Trio spring lamp for repairs. Condition as is.”
The wires were badly damage. The fiber glass — which is a staple design feature of the MCM area and a signifier of authentic pieces — was also cracked and dented.
What could be wrong? Maybe I can fix it. Imagine IF!
This is almost always how I start any project. By being attracted to the problem and not always knowing the solution😅.
Not all those who wander are lost?
I have never wired anything. I have no electrical tools and I’m pretty sure the investment up front to buy wire cutter, stripper, plus electrical wires, plugs, bulbs++ is fueled by the excitement to do. Imagine a world where I can wire a lamp!
If you’ve read this far and thought 'What is the point of this?’ Well, the point is I’m prepared to share How I wired a lamp. And the second point is that there is no point, no agenda. I just felt like I did something good today, and positivity is best shared in a time like this.
Sometimes we fall apart just so we can put ourselves back together
#1: Taking all of the pieces apart and trying to memorize where everything was.
#2: Clip away old damaged wires with the Wire Cutter. Hint: leave enough extra wires on everything you cut. I had to threw out a socket because I got excited using the cutter and cut too close (hence there was not enough wire to reattach.)
#3: Using the Wire Stripper, remove the wire from your new wires about 0.5 inches or .75 cm and replace the old damaged wires with the new ones. Hint: Be sure to find out for yourself which one is the Hot wire and which one is the Neutral wire. Don’t throw away the packaging like I did and had to Google for it.
What you’re seeing down here is the switch wires setup— the ability to turn on the switch and only certain lamp would lit up. I had to follow the wiring that was here so be sure to take note when you take things apart.
Usually, the Hot wire is black or have special marking and the Neutral wire is white. This is important for safety and to reduce over heating.
#4: Attaching the wires to the light sockets using a screw driver: the Hot wire to the Brass / Bronze color screw and the Neutral wire to the Silver / White color screw. Screw tight!
#5: Once you feel that the wires are secured onto the socket, attach the socket only the lamp itself. Depending on which lamp you have, the components may be different. For me, they come in brass screw and teak wood. MCM all the way!
#6: This lamp has some badly damaged fiber glass parts due to age and usage. (Also tbh I think the positioning of these original screws are not optimal for weight distribution since two out of the three lamps have damage in this way. Even the MCM design masters have something to improve.) Using super glue, I pieced them back together and Pi the Husky inspected along the way.
#7: To avoid further weight damage to the lamps, I invented a new way to keep the screws from damaging the wood and fiberglass. Cutting a simple clear padding and middle hole to allow for extra protection. Super excited for this trick.
#8: Holding my breath and turning on the lamp.
It is alive!
Now — a spring loaded lamp is cool because it can stand just by using the pressure made by the inner spring. Mr. Frankenstein will have something to have his tea by, and Pi agrees this is a good addition to our home.
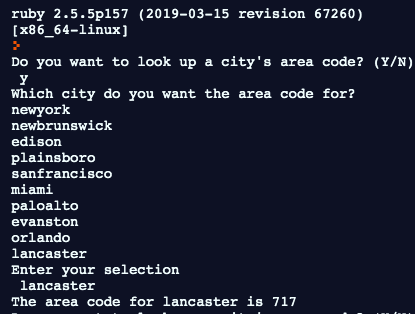
'Yellowbook' Digital Area Code Search Ruby
'Yellowbook' Digital Area Code Search Ruby
# Set up the dataset - hash
dial_book = {
"newyork" => "212",
"newbrunswick" => "732",
"edison" => "908",
"plainsboro" => "609",
"sanfrancisco" => "301",
"miami" => "305",
"paloalto" => "650",
"evanston" => "847",
"orlando" => "407",
"lancaster" => "717"}# Define the methods: Get city names from the hash
def get_city_names(dial_book)
puts "Which city do you want the area code for?"
dial_book.each {|key, value| puts key}
end
# Define the method: Get area code based on given hash and key
def get_area_code (dial_book)
puts "Enter your selection"
city_selection = gets.chomp
dial_book.each do |key, value|
if city_selection == key
puts "The area code for #{key} is #{value}"
end
end
end
# Loop flow
loop do
puts "Do you want to look up a city's area code? (Y/N)"
initiation_answer = gets.chomp.downcase
break if initiation_answer != "y"
get_city_names(dial_book)
get_area_code (dial_book)
endAuthenticator - Working with Username and Password in Ruby
users = [
  {username: "mashrur", password: "password1"},
  {username: "jack", password: "password2"},
  {username: "arya", password: "password3"},
  {username: "jonshow", password: "password4"},
  {username: "heisenberg", password: "password5"}
]

def auth_user(username, password, users)
  users.each do |user_record|
    if user_record[:username] == username && user_record[:password] == password
      return user_record
    end
  end
  "Credentials were not correct"
end

puts "Welcome to the authenticator"
25.times {print "-"}
puts "This program will take the input from the user and compare password"

attempts = 1
while attempts < 4
  print "Username:"
  username = gets.chomp
  print "Password:"
  password = gets.chomp
  authentication = auth_user(username, password, users)
  puts authentication
  puts "Press n to quit or any other key to continue"
  input = gets.chomp.downcase
  break if input == "n"
  attempts +=1
end

puts "You have exceeded the number of attempts" if attempts == 4Creating a simple calculator using branching concept in Ruby
Photo by Editors Keys on Unsplash
Preview
def multiply (num_1, num_2)
num_1.to_f * num_2.to_f
end

def divider (num_1, num_2)
num_1.to_f / num_2.to_f
end

def addition (num_1, num_2)
num_1.to_f + num_2.to_f
end

def subtraction (num_1, num_2)
num_1.to_f - num_2.to_f
end

def mod (num_1, num_2)
num_1.to_f % num_2.to_f
end

puts "Simple calculator"
25.times {print "-"}
puts "Enter the first number"
num_1 = gets.chomp
puts "Enter the second number"
num_2 = gets.chomp
puts "What do you want to do?"
puts "Enter 1 for multiply, 2 for division, 3 for addition, 4 for subtraction, 5 for mod"

user_entry = gets.chomp

if user_entry == "1"
puts "You've chosen to multiply"
puts "The multiplication is #{multiply(num_1, num_2)}"

elsif user_entry == "2"
puts "You've chosen to divide"
puts "The division is #{divider(num_1, num_2)}"

elsif user_entry == "3"
puts "You've chosen to addition"
puts "The addition is #{addition(num_1, num_2)}"

elsif user_entry == "4"
puts "You've chosen to subtract"
puts "The substraction is #{subtraction(num_1, num_2)}"

elsif user_entry == "5"
puts "You've chosen to mod"
puts "The mod is #{mod(num_1, num_2)}"

else
puts "Invalid"

endManipulate Strings in Ruby
puts "What's your first name?"first_name = gets.chompputs "What's your last name?"last_name = gets.chompfull_name = "#{first_name} #{last_name}"reverse_name = full_name.reverseputs "Your full name is #{full_name}."puts "Your full name is reverse is #{reverse_name}."puts "Your name has #{full_name.length - 1} characters in it."What’s your first name?
Thu
What’s your last name?
Do
Your full name is Thu Do.
Your full name is reverse is oD uhT.
Your name has 5 characters in it.

